
Project Teaser: MiniMac

I designed a fully customizable Bluetooth macro keypad. If you want to know more, or maybe build your own MiniMac, keep an eye out for the full project write-up coming soon…
The Goal
Build a compact and portable wireless macro keypad. Media controls are a must, a display would be cool, and 12ish buttons sounds alright.


The Results
Say hello to MiniMac. This was a bigger project for me; it took about two months’ worth of evenings and weekends from start to finish and touched on nearly every area of the lab.
It lived on a breadboard for a month as I built its software from the ground up around an Adafruit nRF52840 Feather. By the end of that stage, MiniMac supported up to 36 user-programmable inputs: 12 macro keys (I’m using red low profile Kailh Choc switches), a 4-way hat switch (mostly because I had a few left over from a previous project), and an encoder knob with push button. But that doesn’t add up to 36, does it? Any one of those buttons can be defined by the user as a shift key, unlocking an additional layer of inputs. And each input can handle everything from simple key press / key-combo assignments to complex macros with precisely timed text and mouse inputs, as well as supporting all the usual media control keys (volume, track control) and a few less common ones (calculator, web browser, some special-sauce app/OS specific commands). And the best part? MiniMac behaves like any other Bluetooth LE HID device, meaning it can connect to any PC, Mac, or smartphone that supports BLE without any special software or drivers required. Oh, and each button has individually addressable RGB backlighting, of course, which can be programmed with several preset patterns or custom frame-by-frame animations (or turned off for much longer battery life).
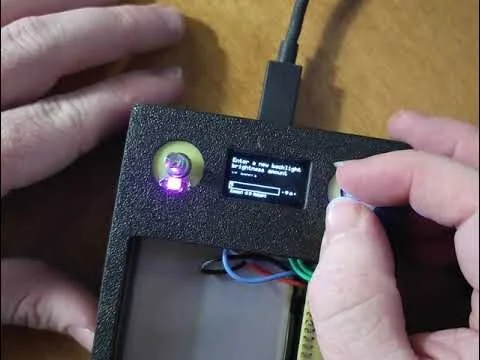
That’s a lot of dials and knobs to turn, and while much of it is accessible via the OLED menu, MiniMac also identifies itself as a USB drive when plugged into a PC (or smartphone, if it has a file browser and text editor) for full access. Configuration, profiles, and a wealth of documentation, are accessible as simple text files on the drive while MiniMac’s plugged in, making the user-programmable part of the process as painless as possible (because, again, no special software requirements on the host device was a key goal of mine here). And MiniMac’s file system is both fool-proof and resilient, with automatic error detection when loading profiles (if the user configured something wrong, it’ll to tell them what’s wrong and how to fix it on the OLED display), as well as options to generate sample profiles and fresh copies of the ReadMe files in case anything gets deleted by accident. MiniMac also charges its whopping 2500mAh battery from the same USB C port, and can still be used like normal while editing profiles and charging—though, thanks to the amazing low-power performance of Nordic’s nRF52 chips, I usually get a month or more of life between charges depending on my backlight settings (and if you’re in a pinch, I’ve even made it possible to adjust the BLE transmission power via the OLED menu, unlocking more battery life at the cost of range).
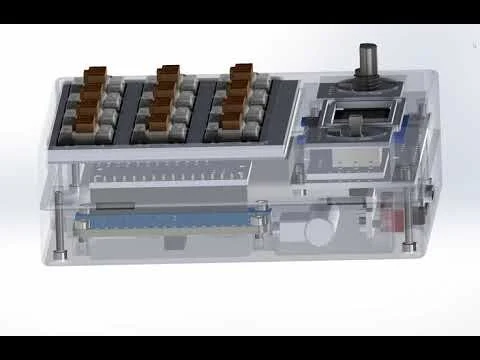
Once all the software was taken care of, it was ready for hardware design, and I utilized nearly everything at my disposal. First, I designed 7 of the 10 PCBs inside MiniMac using KiCAD (the other 3 were the Adafruit board, OLED display module, and a USB C breakout board). With the dimensions and specs of those in hand, I set forth on designing the most compact case I could—though one might argue there’s room for improvement there, certainly if I’d combined some of those PCBs into my own single-board nRF52 implementation rather than using the off the shelf Adafruit board. With so many PCBs and interconnects between them, soldering everything up and getting the wiring under control proved to be a full two- or three-days’ worth of work on its own. Once done though, MiniMac’s two-piece shell closed together nicely, and I was left with a rather cute little button box (box of buttons?). Finally, for a bit more ease in transportation, I made a simple cover to protect MiniMacs buttons and knobs, which doubles as a kickstand.
And as one final aside, at the time of writing I’ve been using MiniMac for a couple months now. It’s a satisfying feeling having built a truly useful tool instead of another project consigned to sit on a shelf and look pretty. And in case you were wondering, my most used profile is one I made for OneNote with shortcuts to cycle through pens, eraser, lasso select, and other drawing tools on my tablet while I’m taking notes for my classes. The second most used profile… Is for Minecraft with some chat command macros (changing game mode, setting the weather, applying some quick potion effects).
That’s cool, I want one
Eventually, I do plan to publish MiniMac’s code, as well as BOMs and print files, for anyone else who might want to build one. If that’s you, be on the lookout for a more detailed project write-up in the coming months. I built MiniMac over the summer, but with classes back up to full swing this semester, it’s taking me longer than I wanted to put together the project write-up (not to mention several other projects from the past year I’ve yet to publish).